Migrating SSO from Shibboleth to Azure AD in SubItUp
Once you have configured everything in Azure AD for Subitup, please follow the below steps to configure the same in your Subitup account:
Step 1: End Point from Azure AD
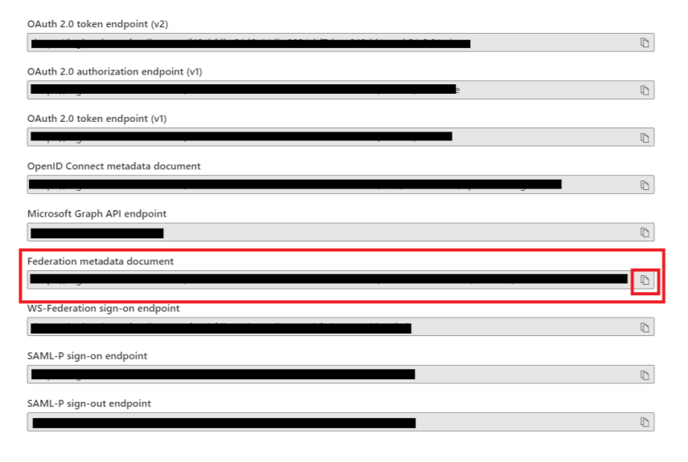
1. In Azure AD, navigate to “App registrations” and from the top nav click on
“Endpoints”.

2. A Dialog box will open showing all the supported endpoints. Please copy
“Federation metadata document” endpoint from it, which needs to be configured
in Subitup Accounts Application.

Step 2: Configuration changes in Subitup:
1. Login to Subitup Accounts Application as a Manager.
2. From the left-hand main nav, under “APPS” click on “Single Sign-On:
Configuration”
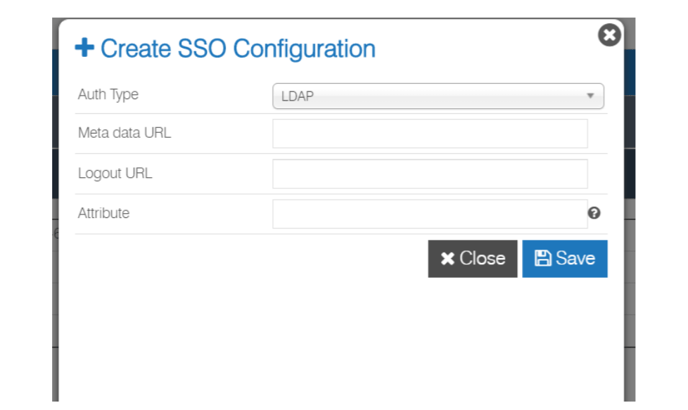
3. Click on “Add SSO Configuration” button.
4. Please provide the new Azure AD configuration:
a. Auth Type: LDAP
b. MetadataURL: Endpoint taken from the App registrations in Azure AD -
Federation Metadata Document
c. LogoutURL: Please provide your respective Logout URL
d. Attribute: Attribute they are going to expose (claim) for authentication.
Mostly it would be email address which looks like following -
http://schemas.xmlsoap.org/ws/2005/05/identity/claims/emailaddress

5. Click on “Save”.
Step 3: Change the SSO Users according to the new Azure AD configuration:
1. Under “APPS” - “Single Sign-On” click on “User Management”
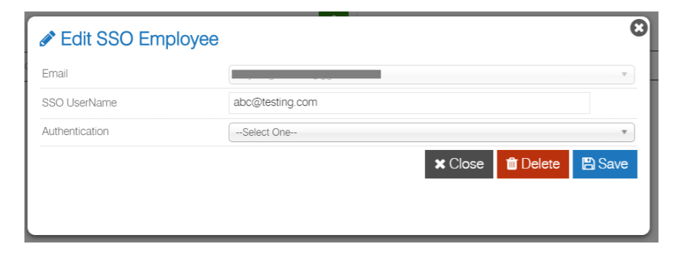
2. Click on “Edit” the Manager/Employee and provide the details:
a. SSO UserName: Please provide the respective attribute (claim) that is
released for the user from Azure AD
b. Authentication: From the dropdown please choose the created Azure AD
configuration.

3. Click on “Save”.
Step 4:
Make sure to make these changes to all the Managers/Employees across the positions in Subitup who need Azure AD SSO logins.
Congratulations!! You are now all set to login to Subitup with SSO Azure AD.