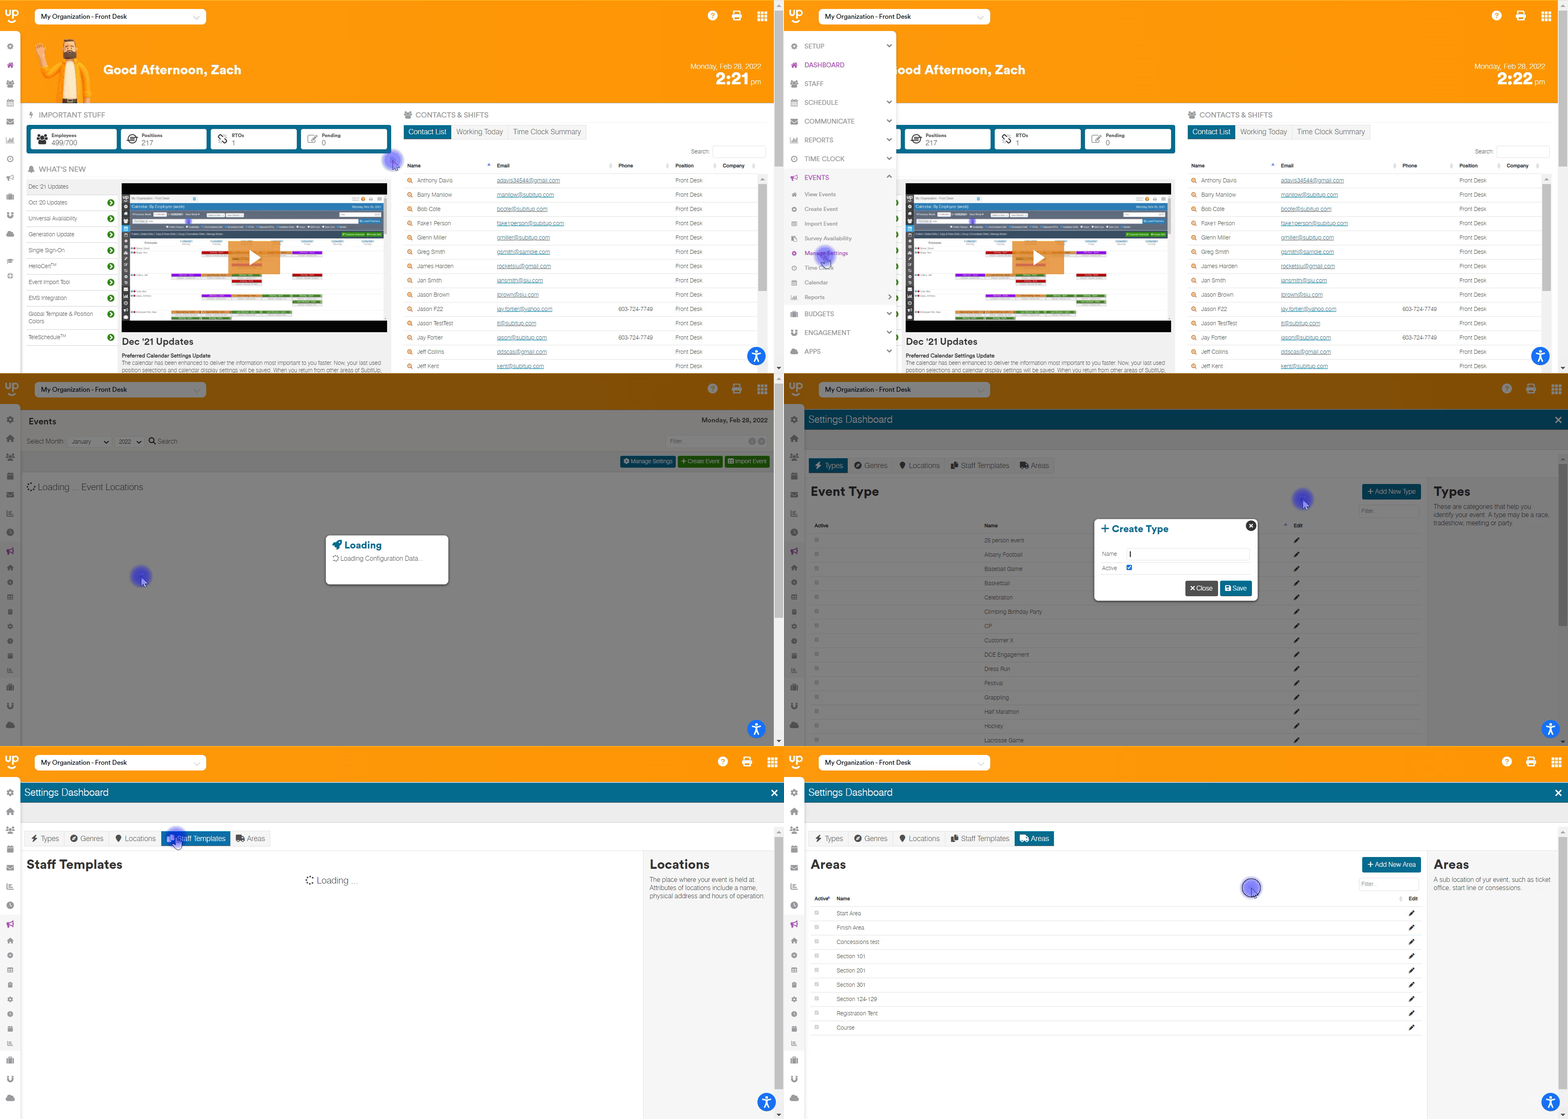
How to create and manage event settings
Tag your events by type, genre, location, specific area, and manage event staffing templates. Create your lists prior to drafting your event schedules for easy tagging.
To manage your event settings:

- In the left-side toolbar, select EVENTS > MANAGE SETTINGS.
- At the top of the page, click on each of the tabs to add at the top to add an event tag.
- For TYPES, GENRE & AREA:
- Click on one of the tabs.
- Click on ADD NEW TYPE, ADD NEW GENRE, or ADD NEW AREA.
- Enter the NAME.
- Check the box next to ACTIVE.
- Click SAVE.
- For LOCATIONS:
- Click on ADD NEW LOCATION
- Enter the NAME.
- If applicable, enter an address, phone number, max occupancy, open days and times.
- Entering the address will show a map on the event dashboard.
- Check the box next to LOCATION IS ACTIVE.
- Click SAVE.
- To edit a STAFF TEMPLATE name or active status:
- Click on the STAFF TEMPLATE tab.
- In the row of the template name, click on the PENCIL icon.
- Edit NAME and/or ACTIVE status of the template.
Notes:
- Staff templates are created when you create a new event and save the event as a template.