
Do you use Guesty to manage your property bookings as well as SubItUp to schedule? Cut down on your data entry time by using our API integration.
1. From the DASHBOARD, click on the APPS tab in the left-side toolbar.
2. Hover over GUESTY and click on CREDENTIALS in the pop-out box.
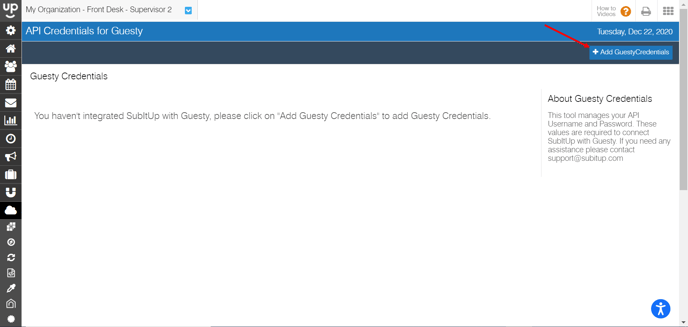
3. In the top-right corner of your screen, click on the ADD GUESTY CREDENTIALS icon.
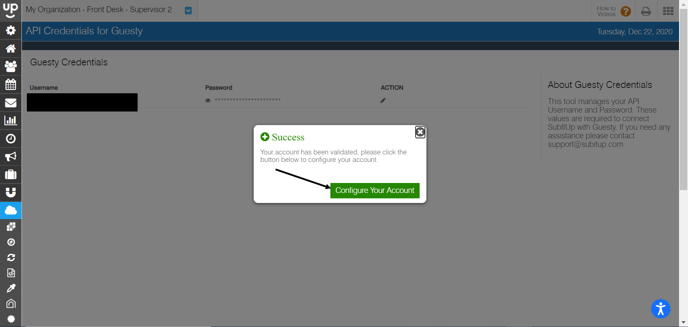
4. Enter in your Guesty username and password and select SAVE.
5. If you have entered in your active Guesty Credentials, continue onto the next step by clicking CONFIGURE YOUR ACCOUNT.
6. You will be re-directed to the CONFIGURE page.
7. On this page, you will see a list of all of your properties that are stored within Guesty. We now need to tell the system what type of shift to create when a new booking at each property is made.
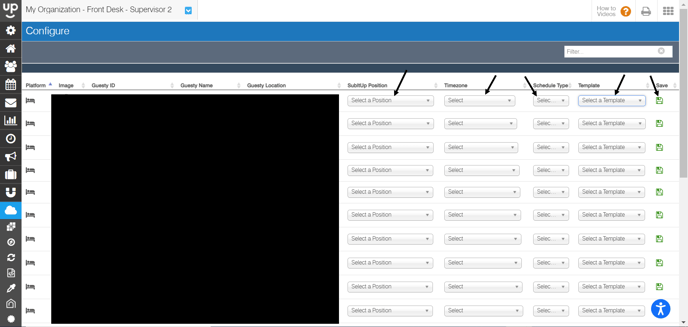
8. Select the POSITION that a shift should be created in when a booking comes in for each property, the TIME ZONE of each property, whether the calendar listing should be created as a shift or a task (SCHEDULE TYPE), and which shift TEMPLATE to use when a new booking comes in.
9. Select the green SAVE icon after you have configured each property.
10. To keep track of what shifts have been created automatically through the integration, click on the LOGS icon under the Guesty tab.
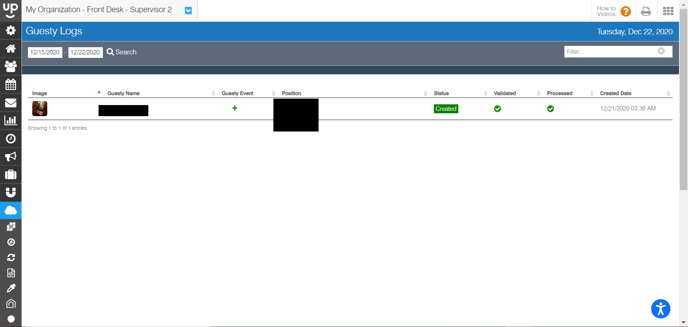
11. Select the date range in the top-left corner and click SEARCH.
12. This will bring up complete information regarding shifts created in the designated time frame.